How to Learn Cake Decorating in St. Louis
Revised November 4, 2026
How to learn cake decorating for beginners?
Start with one in-person beginner class where you frost and take home a real cake, then practice the same three moves at home on cheap box-mix layers: a smooth crumb coat, a piped rosette, and a textured side. Watch video for detail after you’ve felt the frosting under a spatula, not before. Buy the six basic tools, not the 40-piece kit.
Keep reading ↓The cake is sitting on a counter in Ferguson at 9:40 on a Friday night. It’s for a seven-year-old’s party tomorrow at noon. The layers are baked. The frosting is made. Then the first pass with a butter knife drags a strip of crumb clean across the side, and now the whole thing looks like it lost a fight. Somebody says the word bakery. Somebody else says no.
That’s how most people start. Not with a class or a kit, but with a cake that needs to look decent by a deadline and a growing suspicion that the internet made this look easier than it is. It did. The videos cut the boring part, and the boring part is where the cake gets ruined.
So this post is the boring part, in order. Which way of learning is worth your Saturday, the short list of tools that matter, why buttercream misbehaves and how to make it stop, the techniques that look skilled but aren’t, your first three cakes, and what to ask a class before you hand over money. If you’d rather skip all of it and buy the cake, no judgment. Here’s how to find a good bakery in St. Louis.
How to learn cake decorating for beginners?
Start with one in-person beginner class where you frost and take home a real cake, then practice the same three moves at home on cheap box-mix layers: a smooth crumb coat, a piped rosette, and a textured side. Watch video for detail after you’ve felt the frosting under a spatula, not before. Buy the six basic tools, not the 40-piece kit.
Why that order? Because decorating is a hand skill, like parallel parking. You can watch a hundred clips and still not know how much pressure a piping bag wants until you squeeze one. A single class gives you the feel in two hours. Home practice makes it stick. Video fills in the details you now have a reason to ask about.
And the box mix isn’t a shortcut you should feel bad about. Nobody at the party is grading the crumb. They’re looking at the outside, and the outside is the part you’re learning.
Class, video, or just a box mix and a Saturday: which way should you start?
There are four real paths, and they’re not equal. Which one fits depends on how you learn, how much you’ve got to spend, and whether you need a cake by a specific date or just want the skill. Here’s the honest version of each.
A single in-person beginner class
This is the best first dollar most people spend. You show up, a cake and frosting are usually waiting, and an instructor walks the room fixing hands. Watching someone correct the angle of your spatula does more than any explanation. Two or three hours, one cake, and you leave knowing whether you like this. Bakeries, community centers, and independent studios around Alton and Fairview Heights run these, often on weekends.
A craft-store class series
These run several weeks, one technique per session, and they’re built around a tool kit you buy up front. Cheap per hour and structured, which helps if you drift without a schedule. The catch: you often bake and bring your own cake each week, and the curriculum is aimed at one style of piped decoration that may not be the look you want. Ask before you sign up.
Video and the self-taught route
Free, endless, and the way most home decorators actually learned. The problem isn’t quality. It’s that video can’t see your cake. When your frosting breaks, nobody tells you why. Self-teaching works if you’re patient and willing to make three ugly cakes for every good one. Pair it with one class and it works a lot faster. Go it alone first only if the budget says so.
What tools actually matter for a first cake?
Six things. Not the 40-piece kit with the plastic case. Most of what comes in a starter set is tips you’ll never use and a flimsy turntable you’ll replace within a month. Buy these, buy them decent, and stop.
- A turntable. Metal or heavy plastic, and it should spin without wobbling. This is the tool that makes smooth sides possible at all.
- An offset spatula. The bent one, medium size. It keeps your knuckles out of the frosting.
- A bench scraper. A straight metal edge, taller than your cake. Held still while the turntable spins, it does the smoothing for you.
- Two or three piping tips and a handful of bags. One large open star, one large round, one small round. That covers rosettes, borders, dots, and writing.
- A serrated knife or a leveler. Domed layers slide and crack. Flat ones stack.
- Cake boards. Cardboard rounds the same size as your cake. You’ll frost on the board and move the cake without ever touching it.
Everything else is optional until you know what you like. A tip coupler is handy. A cheap digital scale earns its spot if you bake from scratch. Fondant tools, airbrushes, and flower nails can wait until you’ve done ten cakes and still want more.
Why does buttercream fight you, and how do you win?
Buttercream fails for two reasons, and almost never for the reason you think. It’s either the wrong temperature or the wrong consistency. Beginners blame the recipe, the humidity, the oven, the mixer. In our experience it’s the butter, and it’s fixable in five minutes.
Crumb coat first, then chill
The Ferguson cake failed because there was no crumb coat. That’s a thin, ugly first layer of frosting whose whole job is to trap loose crumbs. Spread it, scrape most of it back off, and put the cake in the fridge for twenty or thirty minutes until the surface is firm. Then frost for real. The second coat glides over a cold, sealed cake instead of dragging crumb through it.
Chilling the layers before you even fill them helps too. A cold cake is stiffer, slides less, and stacks straighter. A warm one shifts under the spatula and sheds crumbs like a wool sweater.
Temperature and consistency
Room temperature butter means cool to the touch and giving under a fingertip, not soft and shiny. Too warm and the frosting slumps, turns greasy, and won’t hold a rosette. Too cold and it tears the cake. If it’s slumping, refrigerate the bowl for ten minutes and re-whip. If it’s stiff and dull, add a spoonful of milk or cream at a time, mixed on low.
Consistency is the other half. Frosting for smooth sides should be a little looser than frosting for piping. Piped flowers want it stiff enough to hold a peak. Many people make one batch, split it, and adjust each half. Small steps. You can always add liquid. You can’t take it out.

What are the easiest cake decorating techniques that still look good?
Here’s the good news. The techniques that look most confident are also the most forgiving. None of these need a steady hand. They need the frosting to be right, which you now know how to manage.
Rosettes
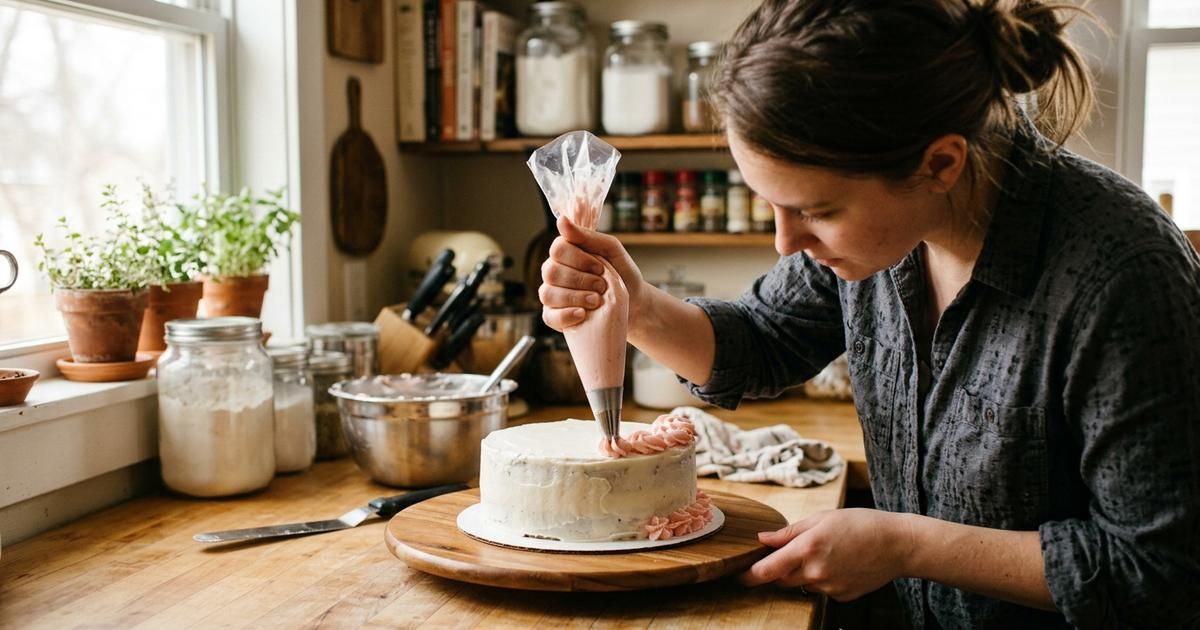
A large open star tip, a bag that’s only half full, and a spiral from the center outward. Cover the whole cake in them, sides and top, and every mistake disappears into the pattern. It’s the single highest-payoff move in beginner decorating, and it’s the one to learn first.
Rustic textured sides
Frost the cake roughly, then drag the tip of the offset spatula in short horizontal strokes, or in one continuous spiral from bottom to top while spinning the turntable. Uneven is the point. Nobody can tell where you messed up because the whole thing looks deliberate.
A simple drip
Chocolate and cream, melted together, cooled until it’s thick enough to hang. Spoon it around the top edge of a cold cake and let it run. The cold cake is the secret. On a warm cake the drip races straight to the plate. Test one drip on the back first.
Sprinkles, done well
Press them into the bottom inch of the sides while the frosting is still tacky, or scatter them on half the top and leave the other half clean. All-over sprinkles read as a kid’s cake. Deliberate placement reads as intent. It’s the same instinct that makes a candy buffet look planned instead of dumped out.
What should your first three cakes be?
Don’t start with the birthday cake. Start three weekends earlier. Each cake below teaches one thing, and each one is edible enough that the neighbors in Bridgeton won’t complain when you hand it over the fence.
Cake one: a single layer, smooth top, rosette sides
One box mix, one round pan, one batch of buttercream. Level it, crumb coat, chill, frost the top smooth with the bench scraper, then hide the sides in rosettes. You’re learning the crumb coat and the piping bag at the same time, and the rosettes cover whatever the sides end up looking like.
Cake two: two layers, filled, fully smooth
Same mix, two pans, and now you stack. Pipe a dam of stiff frosting around the edge of the bottom layer before you fill it so the filling doesn’t squeeze out. Then the real test: smooth sides with the scraper, top edge cleaned up with the offset spatula. It won’t be perfect. That’s the point of cake two.
Cake three: the one with the drip and the writing
Repeat cake two, add a drip, and pipe a short message with the small round tip. Practice the words on parchment first. If the writing goes wrong, scrape it off and put a rosette there. Now you’ve done every move the birthday cake needs, and you did them without an audience.
Before anyone asks you to sell one
Somebody will. Decorating at home for your own family needs no license anywhere. Selling is different. Missouri and Illinois both have cottage-food rules that decide what you can make in a home kitchen, how it’s labeled, and where you can sell it, and the details differ by state and sometimes by county. Call your county health department before you take a single order. It’s a ten-minute call that keeps a hobby from turning into a problem.
Which mistakes cost beginners the most cake?
Four, and they’re all about patience rather than skill. Every one of them happened in that Ferguson kitchen on a Friday night, which is why it went the way it did.
Frosting a warm cake. The top offender. Warm cake sheds crumbs, warm cake melts the frosting touching it, and warm layers slide. Bake the day before if you can. Wrap the cooled layers and refrigerate. Cold cake is easy cake.
Thin frosting. Beginners under-make and over-scrape, and the crumb shows through like a shirt that’s been washed too many times. Make more frosting than you think you need. Load the sides thick, then let the scraper take the excess off.
Over-filling the piping bag. A full bag is warm from your hand, hard to control, and squirts out the top. Half full, twisted closed, and refilled often. Your rosettes get better the moment you do this.
Rushing. Every chill step exists for a reason. Skipping twenty minutes in the fridge costs you an hour of repair. Decorating rewards the person who walks away from the cake and comes back later.
How do you pick a cake decorating class worth paying for?
Same way you’d pick anyone you’re about to pay: shortlist two or three, ask each the same questions, and see whose answers match what you actually want. The gap between what you expect and what they’re set up to deliver is the whole signal. It’s the same approach that works for picking a candle-making class in St. Louis, and the questions are nearly identical.
Ask what a beginner leaves with after session one. A finished cake and two techniques you can repeat is the right answer. A demonstration you watched is not. Ask the class size. Eight people and one instructor means your hands get corrected; twenty means you watch. Ask whether the cake, frosting, and tools are supplied or whether you bake and bring. Ask whether you take the cake home. You should.
Then the question that separates a real instructor from someone reading slides: what do you do when a student’s frosting breaks in the middle of class? A good answer sounds specific. Ten minutes in the fridge, re-whip, here’s why it happened. A vague answer, or a laugh, tells you they haven’t seen it enough times to have a fix ready. And frosting breaks in every class. Someone’s does.
Write down what you told them you wanted. Compare it with what each one said they’d deliver. Pick the one with the smallest gap, not the cheapest or the closest. A class twenty minutes farther out in Fairview Heights that sends you home with a cake beats a nearby one that sends you home with a handout.
Cake vanishes in one night. Want a gift that keeps ticking? Pick a watch instead.
Ready to frost your first real cake? Browse cake decorating classes and suppliers across the St. Louis metro on St Louis Near Me Directory, then call two of them with the questions above and see who has a real answer for broken frosting.
If you run a cake decorating studio or a bakery that teaches hands-on classes, this part is about your next customers - start with the Gold plan.
Frequently asked questions
Is cake decorating hard to learn?
The basics aren’t. A smooth crumb coat, a rosette, and a textured side are all learnable in a single afternoon once the frosting consistency is right. What’s hard is patience: chilling between steps, not rushing, and accepting that the first two cakes are practice. Fine piped flowers and fondant work take months. Nobody needs those for a birthday.
What equipment do I need to decorate a cake?
Six things: a turntable that doesn’t wobble, an offset spatula, a metal bench scraper, two or three piping tips with disposable bags, a serrated knife or leveler, and cardboard cake boards. That covers smooth sides, rosettes, borders, and writing. Skip the big boxed kit. Most of it is tips you’ll never use and a turntable you’ll replace.
What common cake decorating mistakes should I avoid?
Frosting a warm cake, which sheds crumbs and melts your buttercream. Skipping the crumb coat and the chill after it. Making too little frosting and scraping it thin. Over-filling the piping bag until it’s warm and uncontrollable. And rushing, which causes all of the above. Every one of these is a patience problem, not a talent problem.
What is the easiest cake decorating technique?
Rosettes with a large open star tip. Half-fill the bag, hold it straight up, and pipe a tight spiral from the center outward. Cover the whole cake and every imperfection underneath disappears into the pattern. A close second is a rustic textured side made by dragging a spatula through the frosting while the turntable spins. Uneven is the look.
Do you need a license to be a cake decorator?
Not to decorate at home for yourself, your family, or a friend’s party. Selling is where rules apply. Missouri and Illinois each have cottage-food laws covering what home kitchens may produce, how it must be labeled, and where it can be sold, and counties add their own requirements. Before you take money for a cake, call your county health department and ask.
How to become a cake decorator with no experience?
Take one hands-on beginner class, then bake three practice cakes at home over three weekends: rosettes, then smooth sides, then a drip with writing. Bring a photo of each to a local bakery and ask about entry-level help. Plenty of decorators started washing pans and filling piping bags. The photos matter more than the resume, and three decent cakes is a portfolio.
What does a beginner cake decorator need?
A cake that’s cold, frosting that’s the right consistency, the six tools listed above, and about three free Saturdays. That’s honestly the whole list. A class helps because someone corrects your hands in real time. Video helps after that, once you have questions. Expensive gear and a big tip collection can wait until you know you like it.
How long does it take to decorate a beginner cake?
Plan on an afternoon the first time, chill breaks included: twenty minutes to level and fill, a crumb coat and half an hour in the fridge, then the final coat and rosettes. Bake the layers the day before so they’re cold. By cake three you’ll be closer to an hour of hands-on time, with most of the rest spent waiting on the fridge.

Written by a dedicated team of St. Louis locals who live, work, and play right here in the St. Louis metro. Founder Lane Forman and team are committed to building the region’s most trusted directory by verifying listings and connecting local businesses with loyal customers across Missouri and Illinois.